## Demo Content Import

Product: Monogram - Personal Portfolio WordPress Theme
URL: https://hub.jkdevstudio.com/docs/monogram/installation/demo-content-import
Updated: 2026-09-12

The fastest way to get started with Monogram is to import the demo content. This sets up your site to look exactly like the [theme preview](https://monogram-theme.jkdevstudio.com), giving you a complete foundation to customize.

## What Gets Imported

The demo import includes:

<table style="min-width:50px;"><colgroup><col style="min-width:25px;"><col style="min-width:25px;"></colgroup><tbody><tr><th colspan="1" rowspan="1"><p>Content</p></th><th colspan="1" rowspan="1"><p>Description</p></th></tr><tr><td colspan="1" rowspan="1"><p><strong>Pages</strong></p></td><td colspan="1" rowspan="1"><p>All demo pages built with Elementor (Home, About, Contact, Portfolio, Blog, etc.)</p></td></tr><tr><td colspan="1" rowspan="1"><p><strong>Portfolio items</strong></p></td><td colspan="1" rowspan="1"><p>Sample portfolio projects with images, galleries, and metadata</p></td></tr><tr><td colspan="1" rowspan="1"><p><strong>Blog posts</strong></p></td><td colspan="1" rowspan="1"><p>Sample blog posts with featured images</p></td></tr><tr><td colspan="1" rowspan="1"><p><strong>FAQ items</strong></p></td><td colspan="1" rowspan="1"><p>Sample frequently asked questions</p></td></tr><tr><td colspan="1" rowspan="1"><p><strong>Widgets</strong></p></td><td colspan="1" rowspan="1"><p>Sidebar and footer widget configurations</p></td></tr><tr><td colspan="1" rowspan="1"><p><strong>Menus</strong></p></td><td colspan="1" rowspan="1"><p>Primary and secondary navigation menus with all items</p></td></tr><tr><td colspan="1" rowspan="1"><p><strong>Customizer settings</strong></p></td><td colspan="1" rowspan="1"><p>All Kirki Customizer options (colors, typography, layout, features)</p></td></tr><tr><td colspan="1" rowspan="1"><p><strong>Elementor settings</strong></p></td><td colspan="1" rowspan="1"><p>Elementor global styles, colors, and typography</p></td></tr><tr><td colspan="1" rowspan="1"><p><strong>AddToAny settings</strong></p></td><td colspan="1" rowspan="1"><p>Social sharing button configuration (if AddToAny is active)</p></td></tr></tbody></table>

## Prerequisites

Before importing, make sure:

1. The **Monogram** theme is installed and activated.
2. All **required plugins** are installed and activated (JKDEVKIT, ACF PRO, Kirki, Elementor).
3. The **One Click Demo Import** plugin is installed and activated (listed as recommended in the TGMPA installer).
4. Your server **PHP max execution time** is at least 120 seconds (300 recommended). See [Server Requirements](server-requirements).
5. Your server **PHP memory limit** is at least 256 MB.

<div data-callout="warning">

Importing demo content on a site that already has content will add to your existing content - it does not replace it. For the cleanest result, run the import on a fresh WordPress installation.

</div>

## Import Steps

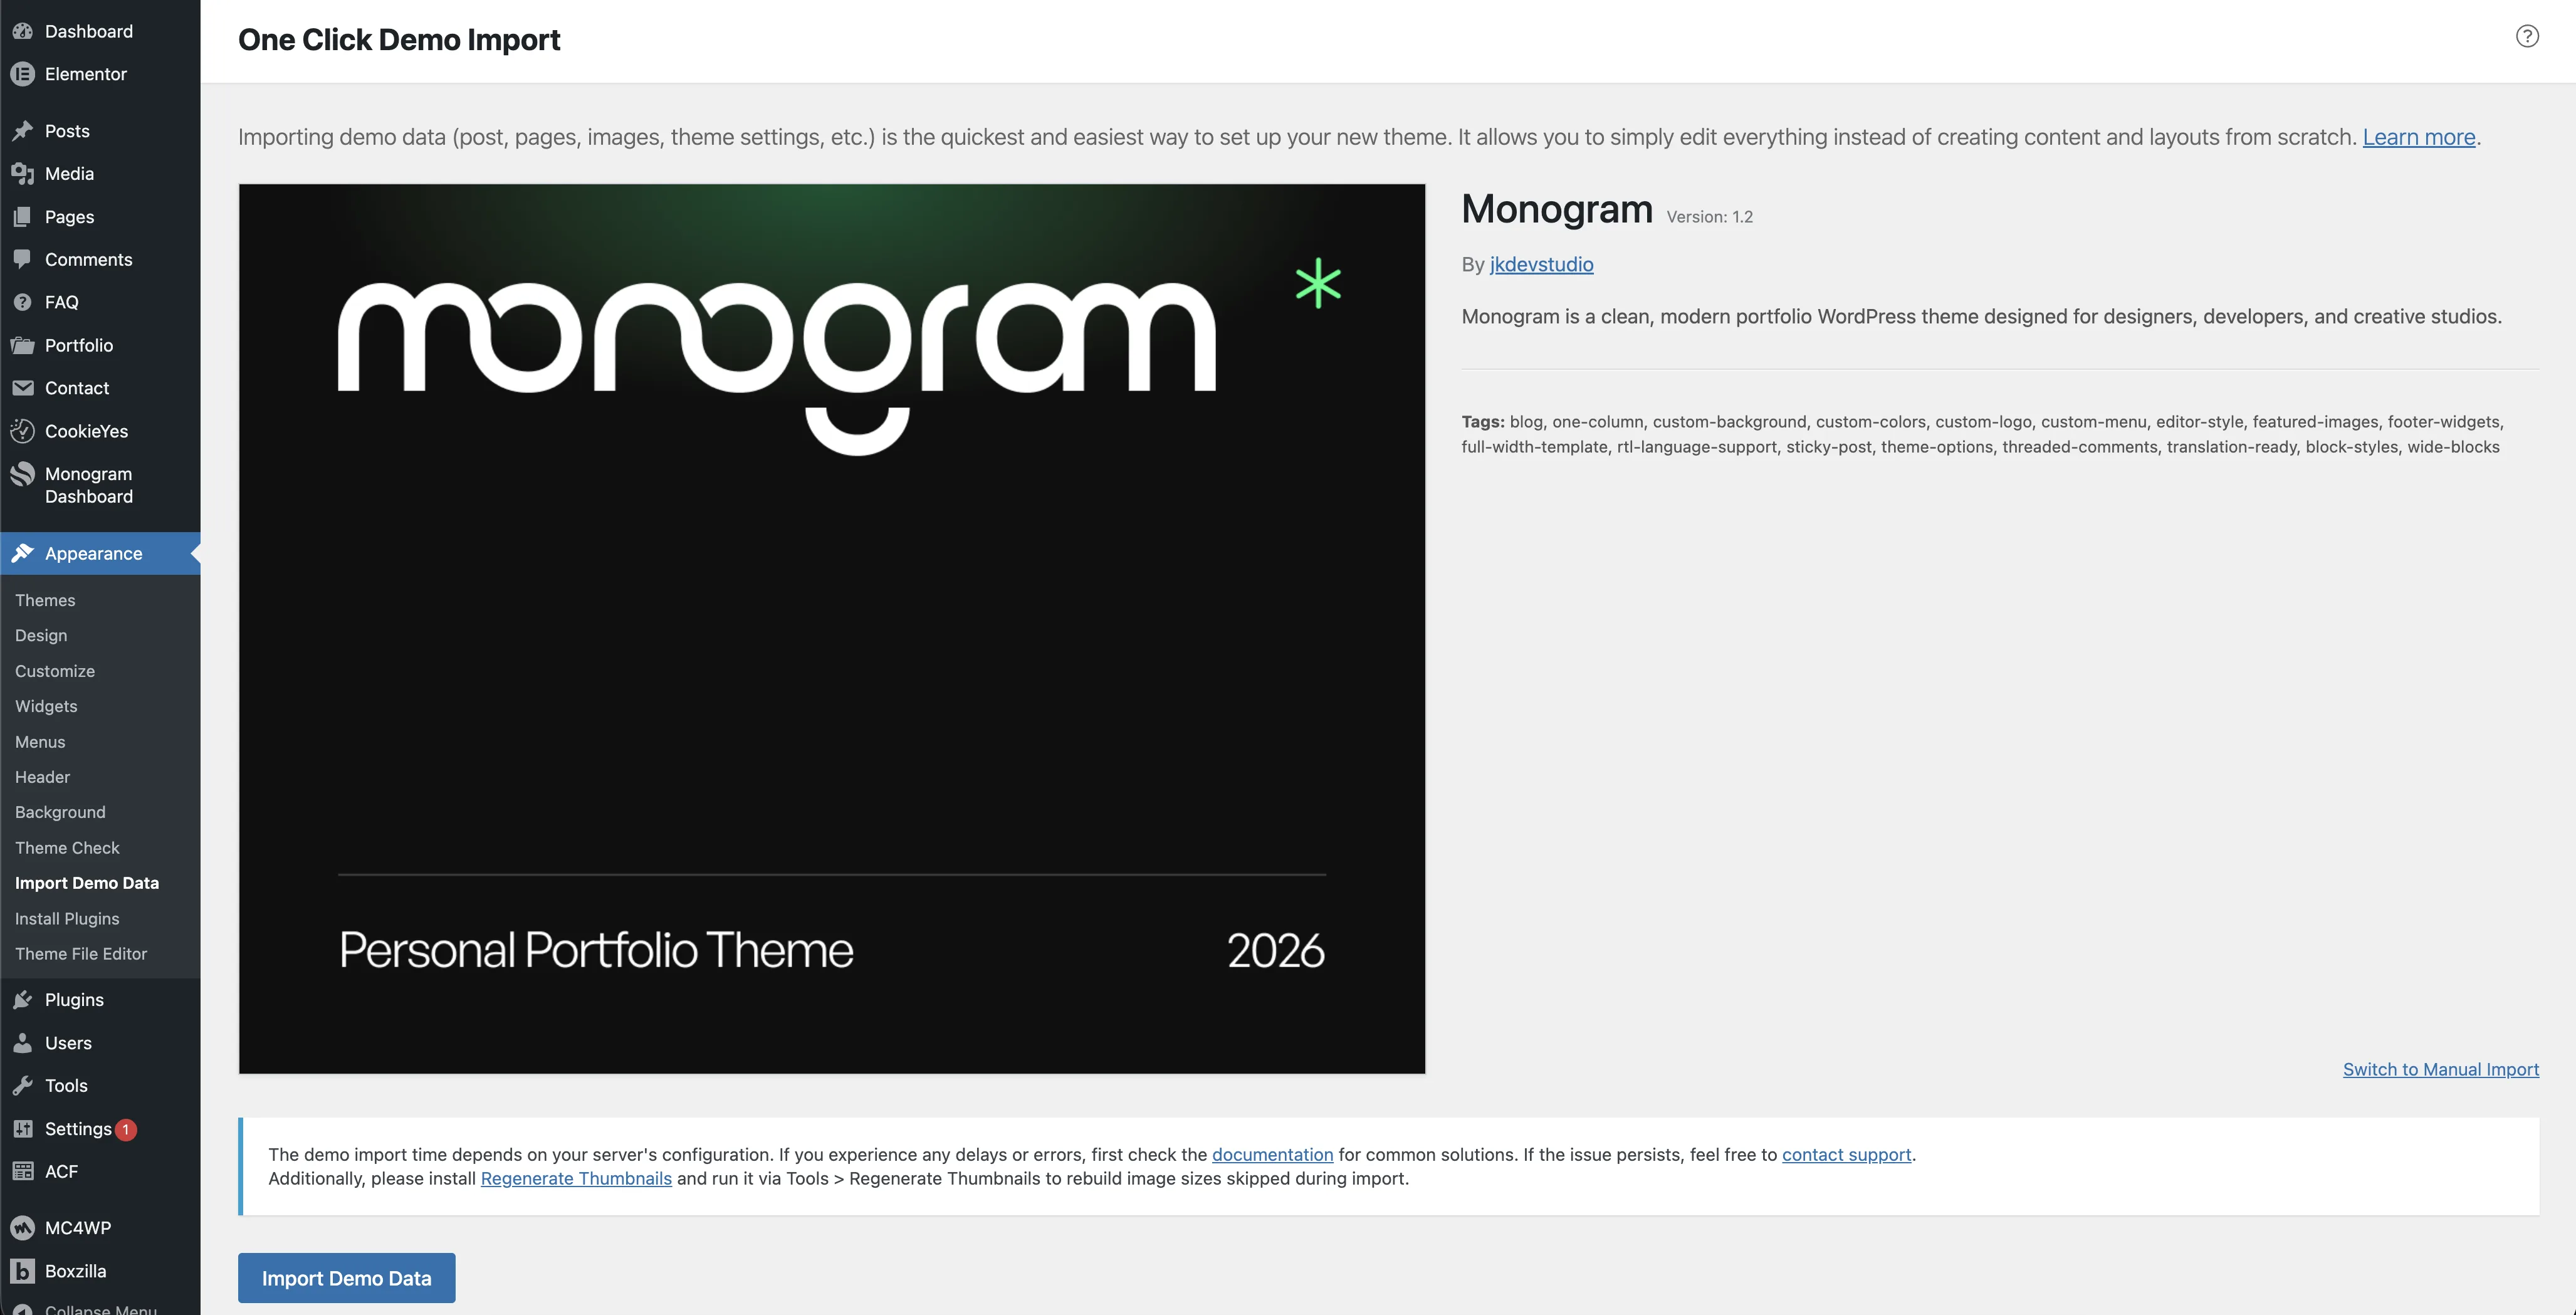
1. Go to **Dashboard &gt; Appearance &gt; Import Demo Data** (this menu item appears when One Click Demo Import is active).
2. You will see the available demo import option. Click the **Import** button.
3. A confirmation dialog appears. Click **Yes, import!** to proceed.
4. Wait for the import to complete. This typically takes **2-5 minutes** depending on your server speed. Do not close the browser tab or navigate away during the import.
5. Once complete, you will see a success message.

<figure class="doc-figure" data-width="75%" data-align="left"><img src="https://hub.jkdevstudio.com/storage/docs/2026/04/902f2d79-2466-46e5-8373-37b3bb863a92.webp" alt="" class="doc-image rounded-xl max-w-full"></figure>

## What Happens After Import

The demo import automatically configures:

- **Front page** - Sets the imported Home page as your static front page (**Settings &gt; Reading**).
- **Blog page** - Sets the imported Blog page as your posts page.
- **Navigation menus** - Assigns imported menus to the theme menu locations.
- **Permalinks** - Sets the permalink structure to `/%postname%/` (Post name).

You can start customizing immediately after the import finishes.

## Import Duration

Expected import times based on server performance:

<table style="min-width:50px;"><colgroup><col style="min-width:25px;"><col style="min-width:25px;"></colgroup><tbody><tr><th colspan="1" rowspan="1"><p>Server Type</p></th><th colspan="1" rowspan="1"><p>Expected Duration</p></th></tr><tr><td colspan="1" rowspan="1"><p>Shared hosting</p></td><td colspan="1" rowspan="1"><p>3-5 minutes</p></td></tr><tr><td colspan="1" rowspan="1"><p>VPS / Dedicated</p></td><td colspan="1" rowspan="1"><p>1-3 minutes</p></td></tr><tr><td colspan="1" rowspan="1"><p>Local development (MAMP, Local)</p></td><td colspan="1" rowspan="1"><p>1-2 minutes</p></td></tr></tbody></table>

<div data-callout="info">

The import includes downloading and processing images, which is the most time-consuming part. Faster servers and better network connections reduce the import time.

</div>

## Troubleshooting

### Import times out or fails partway through

- Increase your PHP `max_execution_time` to 300 seconds.
- Increase your PHP `memory_limit` to 256 MB or higher.
- Some shared hosts aggressively limit execution time. Contact your host to increase limits, or try the import on a local development environment first.

### Missing images after import

- Images may fail to download if your server cannot make outgoing HTTP requests. Ensure the `curl` PHP extension is enabled.
- Try running the import again - One Click Demo Import can resume partially completed imports.

### Pages look different from the demo preview

- Make sure **Elementor** is active. Pages are built with Elementor and will not render correctly without it.
- Clear any caching plugins after import.
- Regenerate thumbnails using the **Regenerate Thumbnails** plugin (see [Thumbnail Regeneration](thumbnail-regeneration)).

### Elementor styles are missing

- Go to **Elementor &gt; Tools &gt; Replace URL** if you see broken references.
- Go to **Elementor &gt; Tools &gt; Regenerate CSS** to rebuild Elementor stylesheets.

For additional troubleshooting, visit the [Demo Import Troubleshooting](https://hub.jkdevstudio.com/docs/monogram/troubleshooting/demo-import-issues) guide.

## Next Steps

After importing the demo content, review the [Initial Configuration](https://hub.jkdevstudio.com/docs/monogram/installation/initial-configuration) guide to fine-tune your site settings.